


Home » Guides » Cases & Brands »
Flight Cases and Racks: Rack Units, Case Types and What to Protect
What a rack unit actually is, how to measure your gear so the case fits first time, and where a gig bag is honestly good enough. Written for touring bands, production companies, installers and DJs.
~12 min read · Updated July 2026 · By the Stage Supply team
In this guide: The 19" rack standard · Counting U · Rack depth · Case types · Gig bag vs hard case · Build features · Shock-mount racks · Weight & transport · Labelling · Measuring & buying · Common mistakes · FAQ
The 19-inch Rack Standard: What 1U Means
Almost every piece of processing, amplification and power distribution in pro audio is built to the same standard: the 19-inch rack. The front panel is 19 inches (482.6mm) wide including the mounting ears, and its height is measured in rack units. One rack unit, written 1U (or sometimes 1RU), is 1.75 inches, which is 44.45mm. A 2U amplifier is 88.9mm tall, a 3U unit is 133.35mm, and so on.
The clever part of the standard is that only the front panel is fixed. Behind the 19-inch faceplate the chassis is usually narrower (around 430 to 440mm) so it slides between the rack rails, and depth is not standardised at all, which is where most case-buying mistakes happen. More on that shortly.
Rack rails, the vertical steel strips you bolt gear to, use either threaded strips or square holes with clip-in cage nuts, typically M6 in the UK. Gear bolts through its rack ears into those holes, normally with plastic-cupped rack bolts so the washer does not chew the faceplate.
How to Count U
A rack case is sold by how many units of gear it holds: a 4U case takes four units of equipment in any combination, for example one 2U amplifier, one 1U wireless receiver and one 1U power distribution unit. Counting what you need is simple arithmetic, but do it on paper before you buy:
- List every unit going in the rack: check each product’s spec sheet for its height in U. If a height is given only in millimetres, divide by 44.45 and round up to the next whole U.
- Add blanking and ventilation panels: a 1U vent panel above a hot amplifier is cheap insurance, and blank panels stop the rack looking like a missing tooth when gear moves between racks.
- Add utility items: a 1U or 2U rack drawer for microphones and leads, a 1U punched panel for XLR feed-throughs, a 1U power strip.
- Add 2U spare: the single best future-proofing decision you can make. Gear collections only grow, and the price difference between a 6U and an 8U case is small compared with buying a whole second case in a year’s time.
Worked example: a small band PA rack with a 2U power amplifier, a 1U wireless receiver, a 1U power distribution unit and a 1U drawer needs 5U. Add a 1U vent panel above the amp and 2U spare and you are at 8U. An 8U case it is, not the 6U that looked “big enough” at first glance.
Rack Depth: The Gotcha That Catches Everyone
Height in U is standardised. Depth is not. A wireless receiver might be 200mm deep; a touring power amplifier can be well over 400mm. Rack cases are sold in different internal depths for exactly this reason, and a case that is perfect in U count but 100mm too shallow is useless.
Measure the deepest unit going into the rack, from the front face to the furthest point at the rear, including any protruding sockets, then add room for what plugs into it. A powerCON or IEC connector plus the bend radius of its cable needs 80 to 100mm behind the chassis. Locking connectors need finger room to release. If the rear of your amplifier touches the back lid of the case, the first pothole transfers the impact straight into the amplifier’s rear panel through the plugs.
The depth rule of thumb
Deepest unit + 100mm of rear cable space = minimum internal case depth. Check the case listing for internal rail-to-rear depth, not the external dimension, and remember front and rear lids on a flight-cased rack eat into the external figure.
Heavy, deep gear also raises the question of rear rack rails. A heavy amplifier hanging off two front ears alone will flex and, over enough miles, crack its faceplate or work its bolts loose. Cases with front and rear rails let you support long chassis at both ends, either through rear rack ears or rear support brackets. For any unit you would not want to hold at arm’s length by its front edge, rear support is not optional on a case that travels.
Case Types and What Each Is For
| Case type | What it is | Best for |
|---|---|---|
| Rack case | 19" rails in a ply flight case, removable front and rear lids | Amplifiers, wireless, processing, power distribution; anything with rack ears |
| Rack sleeve | Lighter open-frame ply sleeve with rails, no full flight-case hardware | Install racks, studio racks, gear that travels by car rather than truck |
| Mixer case with dog house | Console case with a raised rear box (the dog house) covering the connector panel | Digital and analogue mixers that stay plugged in, or partly plugged in, between shows |
| Board / console case | Flat case sized to a specific console, usually foam-lined, often with castors | Larger desks, lighting consoles, anything too heavy to lift cased in one |
| Cable trunk / road trunk | Big open box on castors, sometimes with divider slots | Cable, distro, clamps, consumables; the workhorse of every production van |
| Drawer / production case | Flight case containing lockable drawers, often with a work surface on top | Tools, spares, gaffer, batteries; the touring production office |
| Custom foam case | Case with foam cut to the exact shape of the contents | Microphones, moving heads, cameras, anything irregular or fragile |
| Utility case | General-purpose hinged or lift-lid case in stock sizes | Everything that does not justify a custom build |
Two of these deserve a closer look. The dog house on a mixer case exists because console connector panels sit proud of the frame at the rear: the raised section gives plugs and looms somewhere to live so you can drop the lid without unplugging everything. If your changeovers are tight, a dog house case with the multicore or Cat5 loom left connected saves real minutes every show.
And the humble cable trunk is the case people underbuy. A 1200mm trunk on castors swallows the loose cable, distro and rigging hardware that otherwise travels as twenty loose bags, and it doubles as a rolling table at the venue.
Gig Bags vs Hard Cases: Where Each One Wins
A padded gig bag is not a poor person’s flight case, it is a different tool. It comes down to this:
Choose a padded bag if
- You load your own van, carry your own gear, and nothing gets stacked on top of it
- Weight matters more than crush protection: a bag adds a kilogram or two where a flight case can add fifteen or more
- The gear is robust to start with: lighting stands, cable, speaker poles, LED battens in their own frames
- Budget is tight and the alternative is no protection at all: a bag stops scuffs, scratches and rain between the car and the stage
Choose a hard case if
- Anyone other than you handles the gear: hire clients, venue crew, couriers, festival stagehands
- Cases get stacked in a truck: a bag under a loaded trunk protects nothing
- The contents are fragile or expensive: consoles, amplifiers, wireless racks, moving heads
- The gear earns money: downtime from one dropped amplifier usually costs more than the case that would have saved it
The realistic middle ground for many DJs and small bands is a mix: flight cases for the electronics that would end a gig if they failed, padded bags for stands, cables and fixtures that shrug off a knock.
Build Features That Actually Matter
Two flight cases can look identical in a photo and behave completely differently after a year on the road. These are the details worth checking on any listing:
- Ply thickness: the single biggest factor in strength and weight. Lighter cases use thinner laminated ply and suit gear that travels in cars and vans with careful owners; heavy touring trunks use thicker board and take stacking and truck packs. Thicker is not automatically better, it is heavier, so match it to how the case will actually be handled.
- Ball corners: the pressed steel domes on every corner. They take the impacts that would otherwise split the extrusion joints, and they are what the case lands on when, not if, it gets dropped.
- Butterfly latches: the recessed twist latches on decent cases. They pull the lid tight against the gasket and cannot snag on other cases in a truck pack. Surface-mounted snap latches on budget cases are the first thing to fail and the reason lids fly open in transit.
- Recessed handles: spring-loaded and flush with the case wall, so nothing protrudes to catch during loading. Fixed strap handles on the outside of a case mark it out as furniture, not touring kit.
- Castors: 100mm swivel castors are the touring norm; anything smaller argues with cable ramps and gravel. Buy them with brakes in pairs: two braked castors on the same end will hold a case on a tail lift or a raked stage. Bolted through the ply with a castor plate, never screwed into the board edge.
- Lid stays: on trunks and workboxes, a stay that holds the lid open is a hand you get back and a finger you do not lose. On lift-off lid rack cases, check the lids are interchangeable front and rear so there is one less thing to think about at load-in.
Replacement hardware is a normal part of case ownership: latches, corners, castors and handles are all standard parts, and a case with good ply is worth re-hardwaring for years. We keep flight case components in stock for exactly this.
Shock-Mount Racks: When the Extra Weight Is Worth It
A standard rack case bolts the rails rigidly to the case shell, so every impact the case takes passes into the gear. A shock-mount rack suspends a complete inner rack frame on rubber or elastomer isolators inside the outer shell, so the case can take a hit while the gear inside decelerates gently.
The trade-offs are real: a shock-mounted case is noticeably heavier, noticeably bigger for the same U count, and costs more. It earns its keep when:
- The contents contain hard drives or spinning media: playback machines, media servers, recording rigs
- The gear is vibration-sensitive or has heavy internals on small mounts: valve equipment, some processors and computers
- The rack travels by courier, air freight or trucking you do not control
For a typical amp rack in your own van, a well-built standard rack case with rear support is the sensible spend, and the money saved goes further on the amplifiers themselves. If you are speccing the rack contents as well as the case, our guide to matching amplifiers and speakers covers how to size the amplification the case will be protecting.
Weight and Transport: Vans, Tail Lifts and Stacking
A case that does not suit your vehicle is a case you will grow to hate. Before buying trunks and board cases, measure your van: the load width between wheel arches, the door aperture height, and the load length. Common trunk lengths around 1200mm exist because they pack efficiently across or along typical van floors; an oversized case that only fits one way round dictates your entire pack.
Think about the whole journey of each case:
- Two-person weight: once a loaded case passes roughly 25kg per person on the handles, lifting it up steps or into a high van becomes a risk assessment, not a favour. Castors and ramps beat lifting every time.
- Tail lifts: brake the castors before the lift moves, load heavy cases one at a time, and never ride the lift with an unbraked trunk. Braked castor pairs stop being a nice-to-have here.
- Stacking: heavy trunks on the floor, rack cases above, bags and light cases on top. Cases from the same range stack cleanly; mixed stacks want ratchet straps to the van’s load points.
- Castor boards: a flat board with four castors, sized to your case footprint, turns any non-wheeled case or speaker stack into rolling stock. Cheap, and they save backs.
Weigh the loaded case, not the empty one
Case listings quote empty weight. A 4U case with a touring amplifier in it can easily double or triple that figure, and a full cable trunk is a two-person lift at minimum. Plan handling around loaded weights, especially for anything that goes up stairs.
Labelling and Stencilling for Tours
On a one-band van pack you know every case by sight. The moment cases travel with other people’s gear, at festivals, on shared trucking, through hire desks, labelling stops being cosmetic:
- Stencil or sign-write the company name on at least two faces, ends included, because that is what shows in a packed truck
- Number every case and keep a pack list: “FOH 3 of 7” tells anyone at the dock whether the pack is complete
- Label dishes and tour labels: recessed label holders take swappable cards for per-tour or per-venue routing, which beats layers of half-peeled gaffer
- Colour code by department: coloured ends or tape bands for audio, lighting and backline mean cases find their department without anyone reading a word
- Mark the working face: “THIS WAY UP” and “LID” markings save gear from being stacked upside down by crew who have never seen your pack before
Measuring Up and Buying: Stock Sizes vs Custom
Stock cases cover the vast majority of needs: standard rack depths, common console sizes, trunk formats that have been refined over decades. They are cheaper and available now. Custom builds make sense for odd-shaped or high-value gear, exact van packs, and foam-fitted kits, at the cost of lead time and money. Exhaust the stock options first.
How to measure your gear properly
- Measure the real object, not the brochure: width, height and depth at the widest points, including feet, handles, knobs and every protruding connector.
- Add connected cable space: 80 to 100mm behind rack gear for plugs and bend radius; above a console, enough dog house height for the loom you intend to leave connected.
- Compare against internal case dimensions: external dimensions include ply, extrusion and hardware, which can be 40mm or more per side. Only internal figures matter for fit.
- Sanity-check the loaded weight and the doorways: your lock-up door, the venue’s goods lift and your van all get a vote.
Worked example: you want to case a 2U power amplifier that measures 483mm wide, 88mm high and 420mm deep including its rear sockets. The U count is easy, it is a 2U unit, and with a 1U vent panel above it plus 2U spare for a future wireless receiver and drawer you are looking at a 5U or 6U case. Depth is the deciding spec: 420mm of chassis plus 100mm of rear cable space means at least 520mm of internal rail-to-rear depth, so a shallow 350mm DJ-style rack is out and a standard-depth amp rack is in. That ten-minute exercise with a tape measure is the difference between a case that works for a decade and one that goes straight on the resale pile.
If a case will live its whole life bolted to a wall in an install, a flight case is the wrong buy altogether: a wall-mount cabinet or open frame from the racks and wall plates range does the job for less weight and money, and a rack sleeve covers the ground between install rack and full flight case.
Common Mistakes to Avoid
- Buying exact-fit with no cable space: a rack sized to today’s gear with zero spare U and zero rear clearance is obsolete the day you add one unit or one right-angled plug.
- Ignoring depth: the most common returns reason on rack cases. Height in U tells you nothing about whether your amplifier fits front to back.
- Cheap latches and hardware: a case is only as good as the latch holding it shut. Surface-mounted snap latches and screwed-on (rather than bolted-through) castors fail first and fail in transit.
- Hanging heavy gear off front ears only: deep amplifiers need rear support in any case that travels.
- Forgetting the loaded weight: the case that one person could carry empty becomes a two-person lift loaded, and the stairs at the venue do not care that it fitted the van.
- Unbraked castors: on tail lifts, ramps and raked floors, a case with no brakes is a slow-motion accident. Spec braked pairs from day one.
Popular Picks from the Shop
A few of the cases our customers buy most, all in stock at the time of writing:
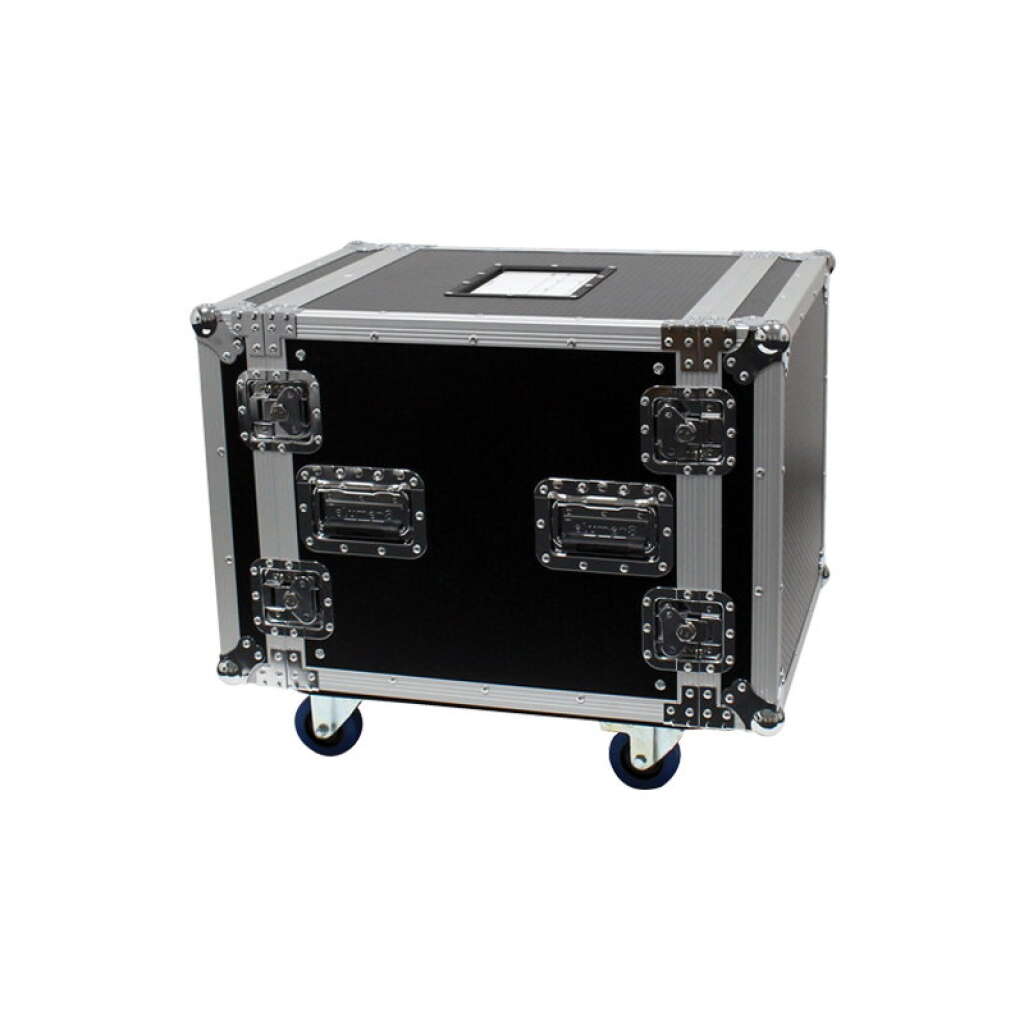
Elumen8 1200mm Road Trunk Flight CaseView product → Elumen8 10U Rack Flight Case with WheelsView product → Elumen8 Four Drawer Production Flight CaseView product → Elumen8 6U Rack Flight CaseView product →
Frequently Asked Questions
What is a rack unit (1U)?
A rack unit is the standard height increment for 19-inch rack equipment: 1U equals 1.75 inches, or 44.45mm. A 2U unit is 88.9mm tall, a 4U case holds four units’ worth of gear, and so on. The 19 inches refers to the front panel width including the mounting ears.
How deep is a standard 19-inch rack?
There is no standard depth, which is the catch. Rack width and U heights are standardised; depth varies from shallow DJ-style cases to deep amp racks. Always check the internal depth of the case against your deepest unit plus around 100mm of rear cable space.
Is a flight case better than a gig bag?
For crush protection, stacking and third-party handling, yes, and it is not close. But a padded bag is lighter, cheaper and genuinely sufficient for robust gear that you handle yourself and never stack. Most working setups use both: cases for the electronics, bags for stands and cable.
What is the dog house on a mixer case?
The raised rear section of a console flight case that covers the connector panel. It lets you close the case with looms still connected, or with plugs in place, which speeds up changeovers and protects the sockets in transit.
Do I need a shock-mount rack?
Only if the contents are genuinely vibration-sensitive (hard drives, media servers, valve gear) or the rack travels by freight and trucking you do not control. For amp racks in your own van, a good standard rack case with rear support for deep units is the better spend.
How many spare U should I leave in a rack?
Two is the working rule of thumb. It covers a future wireless receiver, drawer or processor without forcing a second case, and in the meantime the space earns its keep as ventilation above hot amplifiers.
Why do heavy amplifiers need rear rack support?
Because the front rack ears were never designed to carry a deep, heavy chassis on their own through transport shocks. Over time the faceplate flexes, bolts loosen and ears crack. Rear rails, rear ears or support brackets carry the back of the unit and stop that happening.
Are flight case parts replaceable?
Yes. Latches, ball corners, handles, castors and extrusions are all standard components, and replacing worn hardware on a structurally sound case is routine. A case with good ply can be re-hardwared several times over its life.
Shop this guide
Browse the full range of flight cases, racks and bags, or talk to us about casing a specific rig via the contact page.
Flight Cases Cases & Racks Rack Sleeves Gear Bags Flight Case Components


