

Home » Guides » Mixers & PA Systems »
Gain Staging for Live Sound: Getting Levels Right From Mic to Amp
A mix that is quiet and hissy and a mix that is loud and gritty are usually the same fault: level set in the wrong place. The optimum window at each stage, what dBu and dBFS meters really tell you, how to set preamp gain properly, and why the amplifier’s sensitivity switch decides who clips first.
~11 min read · Updated July 2026 · By the Stage Supply team
In this guide: What gain staging is · The chain in order · dBu, dBFS and metering · Setting preamp gain · Unity gain and faders · Too little, too much · Amplifier sensitivity · Shared preamps · Multitrack recording · Fault finding · Common mistakes · FAQ
What gain staging actually is
Every device in the chain has a noise floor below the signal and a clipping point above it. The gap between them is its dynamic range, and gain staging means keeping the signal in the middle of that window at every stage, from capsule to loudspeaker terminals.
Two facts make it matter. Noise is cumulative: gain applied later amplifies signal and noise together, so nothing downstream removes hiss a badly gained preamp has already lifted. Clipping is irreversible: once a waveform is flat-topped, no fader or EQ puts the peaks back.
Final loudness proves nothing: the same volume can be reached by countless combinations of gain, fader, processor output and amplifier sensitivity. What separates the good ones is headroom, the margin in dB between where the signal sits and where that stage clips.
The chain in order, and what sets level at each stage
Gain problems get solved by finding the stage that is wrong, not by turning something else up. Note how much of this sits outside the console.
| Stage | What sets the level | What goes wrong |
|---|---|---|
| Source and microphone | Performance level, distance, mic sensitivity | A mic too far off, or a condenser where a dynamic was expected |
| Preamp gain and pad | The gain control and the pad ahead of it | The key setting, usually inherited from the last user |
| Analogue to digital conversion | Nothing adjustable: a ceiling at full scale | Invisible if you watch only the master meters |
| Channel processing | High-pass, EQ boosts, gate, compressor makeup | Boosts and makeup are gain too |
| Fader, DCA and mix bus | Fader and DCA position, how many channels sum | Healthy channels can still overload a bus |
| Matrix and outputs | Master fader, matrix sends, output trims | A trim left odd from the last job |
| Processor or speaker DSP | Input gain, filter gains, output gain | Forgotten, because nobody opens the rack |
| Amplifier input | Input sensitivity or voltage gain | Decides which device clips first |
| Loudspeaker | Its own mechanical and thermal limits | No gain control: a clean signal or nothing |
dBu, dBFS and reading the meters
Where the zeros are
Levels are ratios, so every dB figure needs a reference. dBu is referenced to 0.775 V RMS, and professional nominal line level is +4 dBu, about 1.23 V. dBV is referenced to 1 V, and consumer gear quoted at -10 dBV sounds quiet on a professional input. dBFS is referenced to digital full scale, is not a voltage, and counts only downwards.
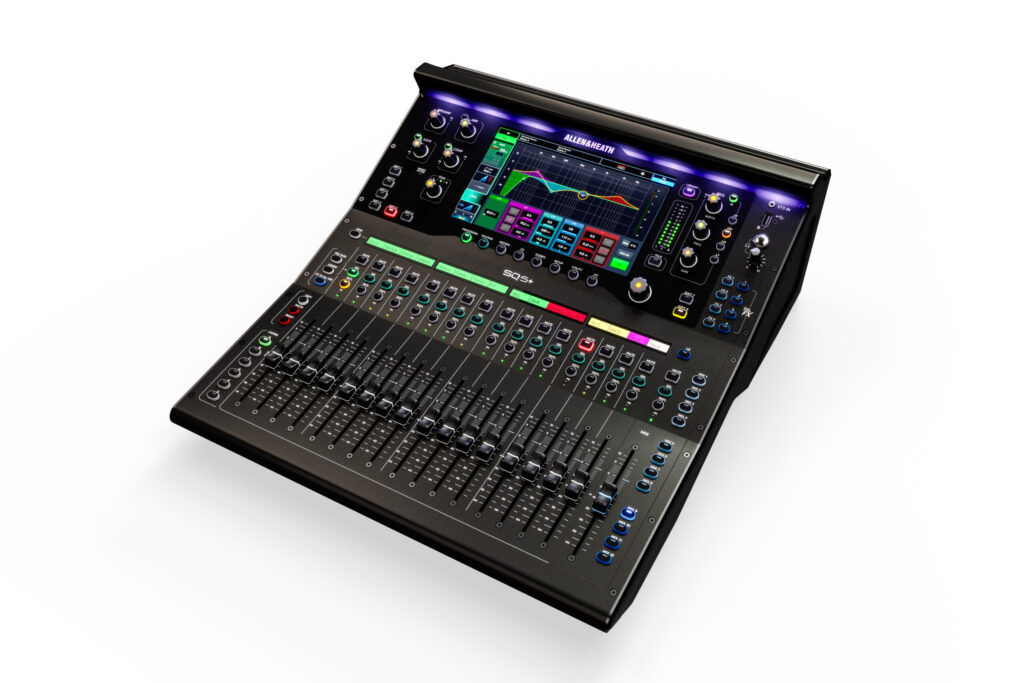
That frames the preamp’s job. A Shure SM58 is specified at -54.5 dBV per pascal, or 1.85 mV at 94 dB SPL, so even a loud vocal delivers tens of millivolts where a console wants over a volt. Condensers typically run 15 dB to 20 dB hotter, so gain is a per-source decision (see choosing live microphones). An Allen & Heath SQ covers the range with 0 dB to +60 dB of gain in 1 dB steps plus a 20 dB pad.
Analogue 0 VU against digital 0 dBFS
On an analogue desk, 0 VU is a nominal working level, conventionally aligned to +4 dBu and read by an averaging meter. Levels above it are normal: the electronics keep going for many dB, then distort gradually. On a digital desk, 0 dBFS is a wall rather than a working level, because a converter cannot produce a sample bigger than full scale. It flat-tops the waveform instead, which is the brittle sound of digital clipping.
Peak, RMS and how much headroom
Peak metering catches the instantaneous maximum, which decides whether you clip; RMS or average metering tracks something closer to loudness. The gap is crest factor: small on a compressed track, very large on a close-miked snare, so two channels at the same average can be many dB apart on peaks.
There is no universal house number for headroom, but the broadcast alignment standards anchor it: EBU R68 maps 0 dBu to -18 dBFS, and SMPTE RP155 maps +4 dBu to -20 dBFS. Both reserve roughly 18 dB to 20 dB above nominal, and live sound is less predictable still. Gain a channel so its average sits around 18 dB to 20 dB below full scale with peaks 6 dB to 10 dB clear, and think in distance from the top rather than colours on a meter.
Headroom on a 24-bit desk is effectively free
Each bit is worth about 6 dB, so 16-bit gives around 96 dB of theoretical dynamic range and 24-bit around 144 dB. Real converters fall short, typically quoted in the 110 dB to 120 dB region, but 20 dB of headroom still leaves around 90 dB of usable range.
Setting preamp gain, step by step
Two minutes a channel at sound check, and the fader comes last.
- Start clean. Muted, fader down, gain at minimum, pad off, leftover EQ boosts and makeup gain zeroed.
- Sort out the physical layer. Phantom on for condensers and active DI boxes only, and high-pass in on anything that is not a kick or a bass.
- Get a realistic source. Performance level, not a sound-check mumble: the loudest line of the loudest song.
- Raise the gain watching that channel’s meter, not the master and not the room. Peaks should land with clear headroom, the average well down the scale.
- Listen at the preamp. Solo or PFL, before EQ, where hiss, grit, a duff cable and a bad mic position all show up.
- Unmute and use the fader for the mix. Gain decided the signal quality; the fader decides the balance, ideally near unity.
- Test the worst case. If the big chorus clips, take 3 dB to 6 dB out of the gain, then put the fader back.
- Save it, as a scene or on the channel list, so next time starts from something known-good.
Changing gain during the show moves the monitors too
Monitor sends are normally pre-fader, so they follow preamp gain. Nudge a vocal gain up 4 dB mid-song and you have raised that vocal by 4 dB in every wedge and in-ear mix, and moved the stage closer to feeding back. Mix with the fader once the show starts. Our guide on stopping feedback explains why every dB there counts.
Unity gain and why faders belong near zero
A stage is at unity gain when it passes signal without changing its level. On a fader that is the 0 dB mark, usually printed bolder or given a detent. It is not a sound-quality setting but the position from which a fader has the most useful control.
The reason is taper. A typical fader offers around 10 dB above unity and then runs down to off, with deliberately uneven spacing. Around unity a millimetre of travel is a fraction of a dB, which is where the half-dB moves that mixing is made of happen; at the bottom of the throw the same millimetre can be several dB.
So fader position is a diagnostic. Channels crushed at the top mean the structure below is too low; channels scraped along the bottom mean something upstream is far too hot. A healthy mix keeps its main channels roughly between -10 dB and unity, and a DCA pulled 12 dB down is 12 dB you will hunt for later.
Where the classic mistakes create problems
Too little gain, compensated downstream
The insidious fault, because nothing looks wrong. The preamp is low, so the fader goes up, then the master, then the amplifiers get opened a little more. The loudness arrives, but preamp noise, converter noise and any hum on the way have been amplified by the same amount, giving a hiss floor that worsens with every channel unmuted. Thermal noise from a typical 150 ohm microphone source is around -130 dBu and no preamp betters it, so after the first stage the ratio is fixed.
Too much gain
The interesting failure is a channel that clips only on transients. Consonants and stick attacks flat-top while the average looks fine, so the channel sounds thin and gritty in a way EQ never fixes, the compressor is slammed by peaks it was not set for, and the pre-fader sends run hot. Pulling the fader down changes nothing: the damage happened before it.
Pad confusion
A pad is a fixed attenuator ahead of the preamp, commonly 20 dB, and it exists to extend the top of the input’s range: line-level sources, active DI feeds, close-miked drums and horns. On a quiet source it makes the preamp work 20 dB harder for the same result, costing noise for nothing.
Phantom power confusion
Phantom power is a supply, not a level control, and it makes nothing louder. Under IEC 61938 the common P48 variant provides 48 V within a 4 V tolerance through matched 6.8 kohm resistors with about 10 mA available, alongside P12, P24 and a higher-current SP48. Condensers and active DI boxes need it; dynamics do not. Switch it off before patching, since a hot patch thumps the system and on a faulty cable can put DC where it does not belong.
Amplifier sensitivity and gain matching
A power amplifier does not have a volume control. It has an input sensitivity or gain setting, answering one question: how much input voltage drives it to full rated output? Who clips first is decided there, usually by a recessed switch nobody documented. Two conventions are common.
- Voltage sensitivity, marked 0.775 V, 1.0 V or 1.4 V. The amplifier reaches full output at that input voltage whatever its power rating, so a rack set to one value clips at one input level throughout.
- Fixed voltage gain, marked in dB and commonly 26 dB or 32 dB. Where the amplifier reaches full output then depends on its power and load, so two different amplifiers on the same setting do not clip at the same input voltage.
On its most sensitive setting an amplifier reaches full output on a modest signal, so it clips while the console still shows healthy meters. On its least sensitive setting the console and processor must run hot and clip first. Either way your meters are not describing the device running out of room.
In a multi-amplifier rack it compounds: set the tops and subs amplifiers differently and they reach full output at different input levels, so the balance changes with level. Set every amplifier to the same convention and value, then balance in the processor. Our guide to matching amplifiers and speakers covers power ratings and load matching.
The limiter belongs before the amplifier, not after it
A limiter works by reducing signal voltage, so the only place it can protect a loudspeaker is upstream of the power stage: the system processor, or the amplifier’s own DSP. A threshold is therefore only meaningful for one amplifier gain setting, and changing the sensitivity switch afterwards makes the same threshold mean a different voltage at the speaker terminals. Set amplifier gain first, limiters second, and label the rack.
Shared preamps: digital snakes and two consoles
On a digital snake the analogue preamp lives in the stagebox or expander, and everything downstream is a copy of the same digitised signal. Split that stream to a front of house console and a monitor console and both listen through one gain control, so when either engineer touches it the other’s mix moves. Two rules keep the peace.
- One console owns the analogue gain. Many touring rigs give the monitor engineer ownership, since an unexpected level change on stage mid-song is worse than one at front of house.
- Everyone else works in digital trim, applied after the split and per console, so it moves only that operator’s mix. On an Allen & Heath SQ the trim range is -24 dB to +24 dB.
Most systems built for shared preamps automate that. Allen & Heath call it gain tracking on SQ and dLive: when the owning console changes the analogue gain, the other surface’s trim moves by the same amount in the opposite direction, so its mix does not shift. Other makers call it gain compensation. It preserves the other console’s level but not its headroom, so a shared gain driven too high still clips at the stagebox converter. Our Qu, SQ and Avantis comparison covers where these features land.
Gain structure for multitrack recording
Recording from the same console is nearly free on a modern desk, and often disappointing, because it inherits the mix’s compromises.
- Choose the tap point deliberately. Most consoles let you select where the record feed leaves the channel: off the preamp, after high-pass and EQ, or post-fader. Pre-fader and pre-dynamics gives clean tracks; post-fader prints every mute and fader ride.
- Give the recording more headroom than the mix. Nobody watches the recorder, so gain for the loudest song: a quiet 24-bit track is fixed afterwards, a clipped one is not.
- Know which changes print. Analogue gain changes always do. Digital trim prints only if it sits ahead of the tap, so with gain tracking active another console’s change need not affect your tracks.
Quick fault finding
| Symptom | Probable stage | Fix |
|---|---|---|
| Quiet and hissy, worse with every channel unmuted | Preamp gain too low, made up downstream | Reset gains on real source levels, faders back to unity |
| Thin and gritty on transients, master looks fine | Preamp or converter clipping before the fader | PFL the channel, drop gain 6 dB, pad hot sources |
| Fine all night, falls apart on the loud song | No headroom anywhere for the crest | Gain for the loudest material, set processor limiters |
| Master or bus clipping, channels healthy | Summing: many channels adding on the bus | Pull DCAs or master back, recover level downstream |
| Everything at the top and still not loud enough | Missing gain downstream: DSP or amplifier setting | Check the processor output and amplifier setting first |
| Subs drift out of balance as level rises | Mismatched amplifier sensitivity or DSP output gains | Set every amplifier identically, balance in the processor |
| Recording clipped although the show sounded clean | Record tap post-fader, or no headroom for the recorder | Move the tap pre-fader and gain for the loudest song |
Common mistakes
- Turning the amplifier up to fix a quiet mix. It raises hiss and hum as much as the music.
- Clipping the preamp then pulling the fader down. The fader is after the damage, so the channel stays distorted and just gets quieter.
- Gaining for sound check, not the show. Bands play louder with an audience in front of them.
- Ignoring the DSP output level. An output left 10 dB down explains an evening of pushing the console too hard.
- Unmatched amplifier sensitivity in a rack. Different clip points mean the balance shifts with level and one amplifier runs out first.
- Everything parked at the top. Faders, master and amplifiers all wide open is missing gain, not a loud rig.
- Mixing with the gain knobs. Pre-fader sends follow gain, so a front of house change lands in every wedge and in-ear mix.
- Setting limiters before amplifier gain. Change the sensitivity afterwards and the thresholds no longer mean what you calibrated.
Popular picks from the shop
Allen & Heath SQ-5+ 48 Channel Digital Mixer with RackUltra FXView product → Allen & Heath CQ-18T 18 Channel Digital MixerView product → BSS BLU100 Soundweb London Signal Processor, 12 In / 8 OutView product → BSS AR-133 Active DI Box, Phantom or Battery PoweredView product →
Frequently asked questions
What is gain staging in live sound?
Setting level at every stage so the signal sits above that stage’s noise floor and below its clipping point, from mic placement and preamp gain through faders and outputs to the amplifier.
How do I set the gain on a mixer?
Mute the channel, zero leftover processing, sort out phantom power and the high-pass, then get the source up to performance level. Raise the analogue gain watching that channel’s meter until peaks land with clear headroom, check it on PFL, then unmute and set the fader. If the loudest moment clips, cut the gain, not the fader.
What is unity gain?
A stage that passes signal without changing its level, marked 0 dB on a fader. Taper gives the finest resolution there and leaves travel both ways, so faders near unity mean the structure below is right.
Why is my mix quiet and noisy?
Almost always too little preamp gain, made up further down the chain. Preamp and converter noise are amplified along with the signal by every stage that follows, so the hiss floor rises with the music and no downstream level recovers the lost ratio.
What is the difference between gain and fader?
Gain sets how hard the source drives the input stage, deciding signal quality, and it feeds pre-fader monitor sends. The fader sets how much of the channel goes into the mix. Gain is a sound-check decision; the fader is what you mix with.
How much headroom should I leave on a digital desk?
Work down from 0 dBFS, an absolute ceiling. Broadcast practice reserves roughly 18 dB to 20 dB above nominal: EBU R68 puts 0 dBu at -18 dBFS, SMPTE RP155 puts +4 dBu at -20 dBFS. Live work wants at least as much.
Shop this guide
Consoles, stageboxes, processors, amplifiers and DI boxes: the stages where your gain structure actually lives.
Digital Mixing Systems Analogue Mixing Stageboxes & I/O System Processors Amplifiers DI Boxes Microphones / DI



