

Home » Guides » Install & Commercial »
Install Speakers: Ceiling, Surface, Pendant and How Many You Need
Which type of installed speaker suits which room, how to work out spacing from ceiling height and coverage angle, how to tap and power the result, and what changes outdoors, in bathrooms and in fire-rated ceilings. Finished with a worked example for a 12m x 8m bar.
~12 min read · Updated October 2026 · By the Stage Supply team
In this guide: Speaker types · 100V or low impedance · Coverage and spacing · Level and headroom · Taps and amplifier power · Back cans and fire-rated ceilings · Outdoors and bathrooms · Zoning · Worked example · Checklist · Popular picks · FAQ
Installed speakers decide whether a venue’s sound works. Too few speakers gives loud tables and dead corners; more, smaller speakers on a grid sound even. The difference is rarely the brand.
This guide covers which speaker, where and how many. How 100V line distribution works is covered in our commercial and background audio guide, so it is not repeated here.
Speaker types and where each one fits
Ceiling speakers
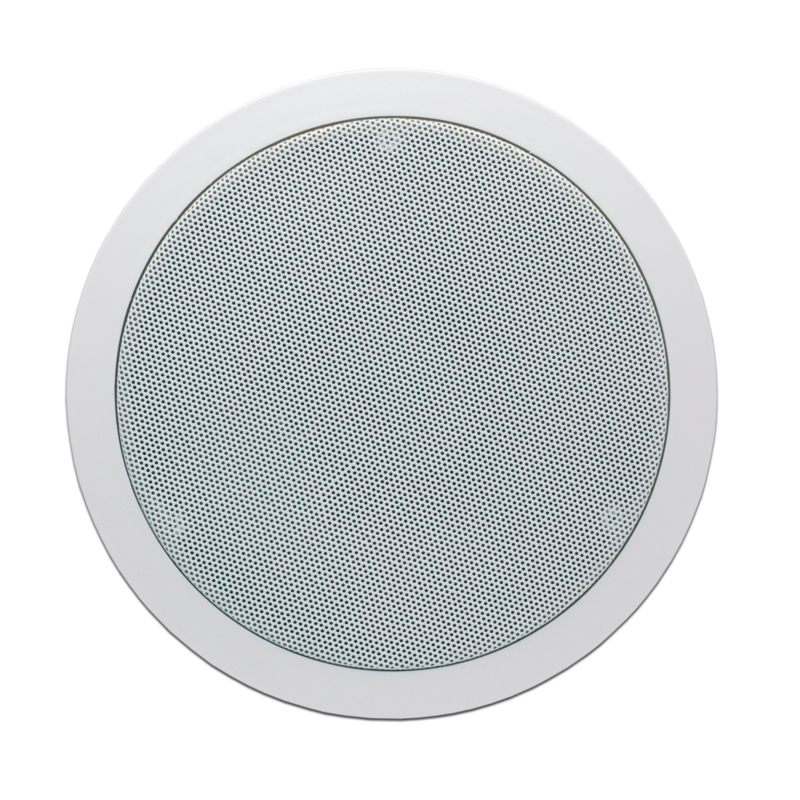
The default for suspended or plasterboard ceilings in offices, shops, restaurants, corridors and classrooms. Three distinctions matter.
- Dual-cone versus two-way. A dual-cone speaker such as the Apart CM6E (100V taps of 6, 3 and 1.5W) is built for paging and background music. A two-way speaker with a separate tweeter, such as the Apart CM20T (20, 10 and 5W) or the Cloud CVS-C53T (24, 12 and 6W), is the better choice wherever anyone is meant to enjoy the music.
- Open back versus enclosed. An open-back speaker uses the void as its enclosure. An enclosed or back-can model brings its own box: Apart describes its CM60DTD as giving predictable performance regardless of ceiling void, and Optimal Audio’s Up 6 has an integrated steel backcan.
- Tile speakers. In a 600 x 600mm grid ceiling, a drop-in tile speaker such as the Biamp DC220T-M replaces a tile outright, with no cutting.
Surface-mount and cabinet speakers
Bracket-mounted boxes for solid, listed or exposed-services ceilings, and wherever you want to aim sound at an area. Check whether the model is 100V line, low impedance or switchable: the Apart MASK6C, for instance, is an 8 ohm speaker only, while its MASK6CT sibling adds a 100V transformer.
Pendant speakers
For open or very high ceilings. A pendant hangs on a cable to bring the speaker nearer the listeners, and many radiate all the way round; Cloud quotes 360° horizontal dispersion for its CVS-P42T and CVS-P62T pendants. The supplied suspension set hangs the speaker, but the point it hangs from is your responsibility: fix to structure strictly to the manufacturer’s instructions, never to a ceiling tile or grid.
Column speakers
A tall stack of small drivers has a wide horizontal pattern and a narrow vertical one, so energy goes at the audience instead of the ceiling and floor. That suits reverberant churches and halls. Electro-Voice publishes 130° horizontal coverage for its LRC-1100, with a switchable 20° or 40° vertical pattern. See our church AV guide and school hall AV guide for how columns fit those rooms.
Outdoor and weatherised speakers
Beer gardens, terraces, pools and yards. Read the small print: Optimal Audio notes that its Cuboid TX models need the optional CIPKIT connector cover to achieve their full IP54 rating outdoors, and Biamp specifies its Apart CMAR marine speakers as chlorine and saltwater proof.
Install subwoofers
Small ceiling and surface speakers make little bass. Where music matters, add a subwoofer and high-pass the satellites. Options include the in-ceiling Apart CMSUB8 and the surface-mount Electro-Voice EVID-S10.1D. Most install subs are low impedance: the EVID-S10.1D needs its separate IP-10D-TB transformer panel to run on a 100V line. Placement principles are in our subwoofer guide.
100V line or low impedance?
Many speakers, long runs or level set per speaker: use 100V line. Two to four higher-quality speakers near the amplifier: low impedance is simpler and sounds best. Many install speakers do both. The full explanation, including why you must never put an 8 ohm speaker on a 100V output, is in the commercial and background audio guide, and low-impedance loads are covered in matching amplifiers and speakers.
The one fact needed here: each tap sets the power a speaker draws, and each step up doubles it, a 3 dB increase in level. Taps are therefore your coverage tool.
Coverage and spacing: the geometry
Spacing is about the listening plane, the height of the listeners’ ears, not the floor. The distance that matters is the ceiling height minus ear height. Plan on about 1.2m for seated listeners and 1.5m for standing.
The coverage circle
A ceiling speaker’s coverage angle is normally the angle at which level has fallen 6 dB from on-axis. Project that cone down to the listening plane and you get a circle. Its radius is:
Coverage radius (rule of thumb)
r = (ceiling height minus ear height) x tan(coverage angle / 2). With a 90° design angle, tan(45°) = 1, so the radius simply equals the drop from speaker to ears.
Be careful with the angle you plug in. Some ceiling speakers are quoted at 180° conical, which taken literally gives an infinite circle. Yamaha’s installation design guidance points out that the nominal angle is measured at a constant distance from the speaker, whereas listeners sit on a flat plane that is further away at the edges, and puts the effective coverage angle at about 70 to 80% of nominal. As a rule of thumb, then, a speaker quoted at around 110° to 120° is planned at about 90°.
Three layout densities
Next, choose how much adjacent circles overlap. On a square grid, centre-to-centre spacing follows from the geometry:
| Layout | What it means | Square grid spacing | Suits |
|---|---|---|---|
| Edge to edge | The -6 dB edges of neighbouring circles just touch | 2 x r | Background music in fairly dead, quiet rooms |
| Minimum overlap | Every point is inside at least one circle | 1.41 x r (r x √2) | Paging, speech, busier and more reflective rooms |
| Full overlap (edge to centre) | Each circle’s edge reaches the next speaker’s axis | 1 x r | Critical speech, foreground music, noisy spaces |
Why 1.41? On a square grid, the point furthest from any speaker is the centre of each square, half a diagonal away: spacing x √2 / 2. For that point to land exactly on a circle’s edge, spacing x 0.707 = r, so spacing = r / 0.707 = 1.41 x r. Edge to edge leaves those square centres outside every circle; published analysis puts the dip at a few decibels, which background music tolerates and speech in a noisy room does not.
The practical rule follows: background music can live with edge to edge; speech needs overlap. Start the first row half a spacing in from each wall.
How ceiling height changes the count
Low ceilings need more speakers, not fewer. With a 90° design angle and standing ears at 1.5m, a 2.7m ceiling gives a 1.2m radius (2.4m edge-to-edge spacing), a 3m ceiling a 1.5m radius (3m spacing) and a 4m ceiling a 2.5m radius (5m spacing). In much higher spaces level falls with distance and reflections take over, so pendants, surface speakers or columns usually serve better.
Level and headroom: checking the speakers can do the job
Spacing decides evenness; tap and sensitivity decide how loud it can go. Two rules of physics do the work:
- Power: level at 1m = sensitivity (dB at 1W/1m) + 10 x log10(tap watts). Each doubling of tap adds 3 dB.
- Distance: level falls by 20 x log10(distance in metres) from the 1m figure, which is 6 dB per doubling of distance in free field. Indoors, reflections add a little, so this is conservative.
Take the Apart CM20T, which Apart rates at 86 dB (1W/1m). On its 10W tap that is 86 + 10 = 96 dB at 1m. A standing listener 1.5m below hears about 96 minus 3.5 = 92.5 dB on axis, a few decibels less at the edge of the circle, and allow a decibel or so for transformer and cable losses. That is the maximum, with the amplifier at full output. Busy-night level should sit well below it, leaving room for music peaks and paging. If the arithmetic only just reaches your target, go up a tap, choose a more sensitive speaker, or add speakers. See reading a speaker spec sheet for where these figures come from.
Taps and amplifier power
On a 100V line, the load on each amplifier channel is the sum of the taps on that line. Size the amplifier from that total plus headroom, not from the number of speakers.
- Choose a tap per speaker from the level check above, nudging up near noise sources and down in quiet corners.
- Sum the taps per line. Every speaker on the channel counts.
- Divide by 0.8. Keeping the tap total at or below about 80% of the channel’s rated 100V output is the widely used margin for transformer losses, peaks and paging. More margin is better on systems that get pushed.
- Round up to a real amplifier with room to add speakers.
Do not tap every speaker at its maximum and then turn the amplifier down. It wastes amplifier capacity and leaves no adjustment for hot spots. For low-impedance systems the sum-of-taps rule does not apply; match power and impedance as described in matching amplifiers and speakers.
Back cans, fire hoods and fire-rated ceilings
A ceiling speaker needs a hole, and that hole matters in two ways.
Acoustics and the void
An open-back speaker radiates into the void as well as the room,, so sound travels above the ceiling into the next space. A back can contains the rear of the driver and steadies the low end. Check the void depth against the speaker’s stated depth before ordering, especially in shallow plasterboard ceilings.
Fire-rated ceilings
Some ceilings are part of a building’s fire protection, separating floors or protecting an escape route. In England, Approved Document B to the Building Regulations states that for a fire-separating element to be effective, every opening that allows services to pass through it should be adequately protected by sealing or fire-stopping so that its fire resistance is not impaired. Wales, Scotland and Northern Ireland have their own equivalents. A speaker cut-out is such an opening.
Find out before you cut
Whether a ceiling is fire-rated is a question for the fire strategy, fire risk assessment or building control. Where it is, the opening must be protected with a product that has fire test evidence for that ceiling, typically a tested fire hood or a speaker with a documented fire-rated enclosure, fitted strictly to its manufacturer’s instructions. A generic back can is not automatically a fire barrier.
Do not confuse this with EN 54-24, which certifies loudspeakers for voice alarm systems, such as the Apart ENCM6T6 with its metal fire dome. Background music is not voice alarm; see the BS 5839-8 point in full.
IP ratings: outdoors, pools and bathrooms
IP codes come from IEC 60529. The first digit is protection against solids and dust, the second against water. For speakers, the useful digits are:
| Digit | Meaning | Stocked examples |
|---|---|---|
| First digit 5 / 6 | Dust protected / dust tight | Most install speakers rated 5x or 6x |
| Second digit 0 | No water protection claimed | Apart CM6E (IP50), indoor only |
| Second digit 4 | Splashing from any direction | Biamp EX-S range (IP54), Apart MASK (IP64) |
| Second digit 5 | Water jets | Apart CMAR marine range (IP65) |
| Second digit 6 | Powerful water jets | Biamp Desono COLW columns (IP66) |
| Second digit 7 | Temporary immersion | Rarely relevant to speakers |
Outdoors, mount under eaves where you can, angle drivers down rather than up, and keep connections inside any cover the manufacturer supplies. Some ratings depend on accessories: the EVID-S10.1D sub is IP54 as standard and IP65 only with its supplied port covers fitted.
Bathrooms and shower rooms
BS 7671 Section 701 divides rooms containing a bath or shower into zones. Zone 0 is inside the bath or shower tray. Zone 1 is above it to 2.25m (or the highest fixed shower head, if higher), and only a short list of fixed equipment is allowed there, plus equipment on a SELV or PELV supply not exceeding 25V AC, which a 100V line is not. Zone 2 extends 0.6m beyond zone 1, and equipment there needs at least IPX4. In practice, keep speakers out of zones 0 and 1, use IPX4 or better in zone 2, and leave the zoning to the electrician.
Zoning: split the system by how the rooms are used
Every area that will ever want a different source or level should be its own zone on its own amplifier channel: bar, dining room, function room, garden, toilets and corridors in a pub; sales floor, fitting rooms and stockroom in a shop. The tap budget is per channel. How zone mixers, paging priority and wall controls work is covered in the 100V guide; venue-specific layouts are in our pub and bar AV and wedding and function venue guides.
Worked example: a 12m x 8m bar with a 3m ceiling
A 12m x 8m bar, plasterboard ceiling at 3m, mostly standing customers, music in the evening and occasional announcements, using two-way 100V ceiling speakers.
- Drop to the ears. 3.0m ceiling minus 1.5m standing ear height = 1.5m.
- Coverage radius. Planning at 90° effective: r = 1.5 x tan(45°) = 1.5m.
- Compare densities. Edge to edge spacing = 2 x 1.5 = 3.0m. Minimum overlap spacing = 1.41 x 1.5 = 2.1m.
- Count. Edge to edge: 12 / 3.0 = 4 columns; 8 / 3.0 = 2.7, round up to 3 rows: 12 speakers at 3.0m x 2.67m centres, the first row 1.5m from the end walls and 1.33m from the side walls. Minimum overlap: 12 / 2.1 = 5.7, so 6 columns; 8 / 2.1 = 3.8, so 4 rows: 24 speakers.
- Decide. Twelve is a sensible music layout here, and the slightly closer row spacing (2.67m) tightens coverage across the width. If this were a hard-surfaced space where announcements really mattered, the minimum overlap layout would be the stronger design.
- Check level. With an 86 dB (1W/1m) speaker on a 10W tap: 96 dB at 1m, about 92.5 dB at 1.5m on axis before losses. Plenty, with headroom.
- Split into zones. Servery end and seating end as two zones of six, so the quieter end can run lower.
- Sum the taps. 6 x 10W = 60W per zone. 60 / 0.8 = 75W minimum per channel. Choose comfortably more, leaving room for a garden zone later.
- Add low end if the brief is music. A subwoofer on its own channel, with the ceiling speakers high-passed does more than higher taps.
Installation checklist
- Confirm whether any ceiling you are cutting is fire-rated, and specify tested fire protection where it is.
- Check void depth, joists, pipes and lighting before marking out.
- Draw the layout, noting ear height, design angle and spacing.
- Choose 100V line or low impedance per zone, and never mix them on one amplifier output.
- Record every speaker’s tap on the drawing, and sum per channel with at least a 20% margin.
- Check IP ratings, and the accessories they depend on, for every outdoor, pool or bathroom position.
- Fix everything to the manufacturer’s instructions, with supplied safety cables.
- Measure each line before connecting the amplifier.
- Walk every zone at busy-night level and adjust taps for hot spots and holes.
Popular picks from the shop
Biamp Apart CMAR5-W 5″ 2-Way Marine Built-in Speaker, IP65View product → Biamp Apart MASK6C 6.5″ Clickmount Speaker, IP64, PairView product → Biamp Apart CM20T 6.5″ 2-Way Ceiling Speaker, 100VView product → Optimal Audio Cuboid 5TX Surface Speaker, 100VView product →
Frequently asked questions
How many ceiling speakers do I need for my room?
Work out the coverage radius: ceiling height minus ear height, multiplied by tan of half the design angle. Space speakers at twice that radius for background music, or about 1.4 times it for speech, then divide the room’s length and width by the spacing and round up. A 3m ceiling with standing listeners and a 90° design angle gives 3m spacing for music.
How big an amplifier do I need for 100V speakers?
Add up the taps on each line and divide by 0.8. Twelve speakers at 6W is 72W, so the channel needs at least 90W of rated 100V output, and more if you expect to add speakers or page over loud music.
Do ceiling speakers need fire hoods?
Where the ceiling is fire-rated, the opening has to be protected so the ceiling’s fire resistance is not reduced, which in practice means a tested fire hood or a speaker with documented fire-rated construction for that ceiling. Where it is not, a back can is mainly an acoustic choice. Confirm the ceiling’s status before cutting.
What IP rating does an outdoor speaker need?
IPX4, splashing from any direction, is the practical minimum for a sheltered position such as under a canopy. Exposed positions, pool surrounds and anywhere hosed down justify IPX5 or IPX6. Check what the rating depends on, such as connector or port covers.
Can I put a speaker in a bathroom or shower room?
Yes, outside zones 0 and 1 as defined in BS 7671 Section 701, with at least IPX4 in zone 2. A 100V line is not the low-voltage SELV or PELV supply zone 1 would require. Leave the zoning decision to the electrician.
Do I need a subwoofer with ceiling speakers?
Not for paging and quiet background music. Where music is part of the experience, one install sub with the ceiling speakers high-passed usually beats turning them up.
Shop this guide
Install speakers, subwoofers and amplifiers, in stock. Send us your room dimensions and we will help check the layout.
Install Speakers Ceiling Speakers Install Subwoofers Install Amplifiers Zone Mixers Install Accessories



